
Halftone & Particle Simulation Dithering - To Machine Vectors

For my Pixel by Pixel final project, I developed a tool for my artist friend who creates halftone images using a CNC. His current workflow is going through photoshop filters made for halftone, then outputs the image to illustrator where he converts to vectors so that it can be machined by a CNC. It is very time consuming to use the photoshop filters and you can’t really see what the output is going to look like until you run the filter and make it into vectors in illustrator. With the processing sketch, you can output directly to machine-able vectors and fine tune the output before saving as an SVG using the mouse position.
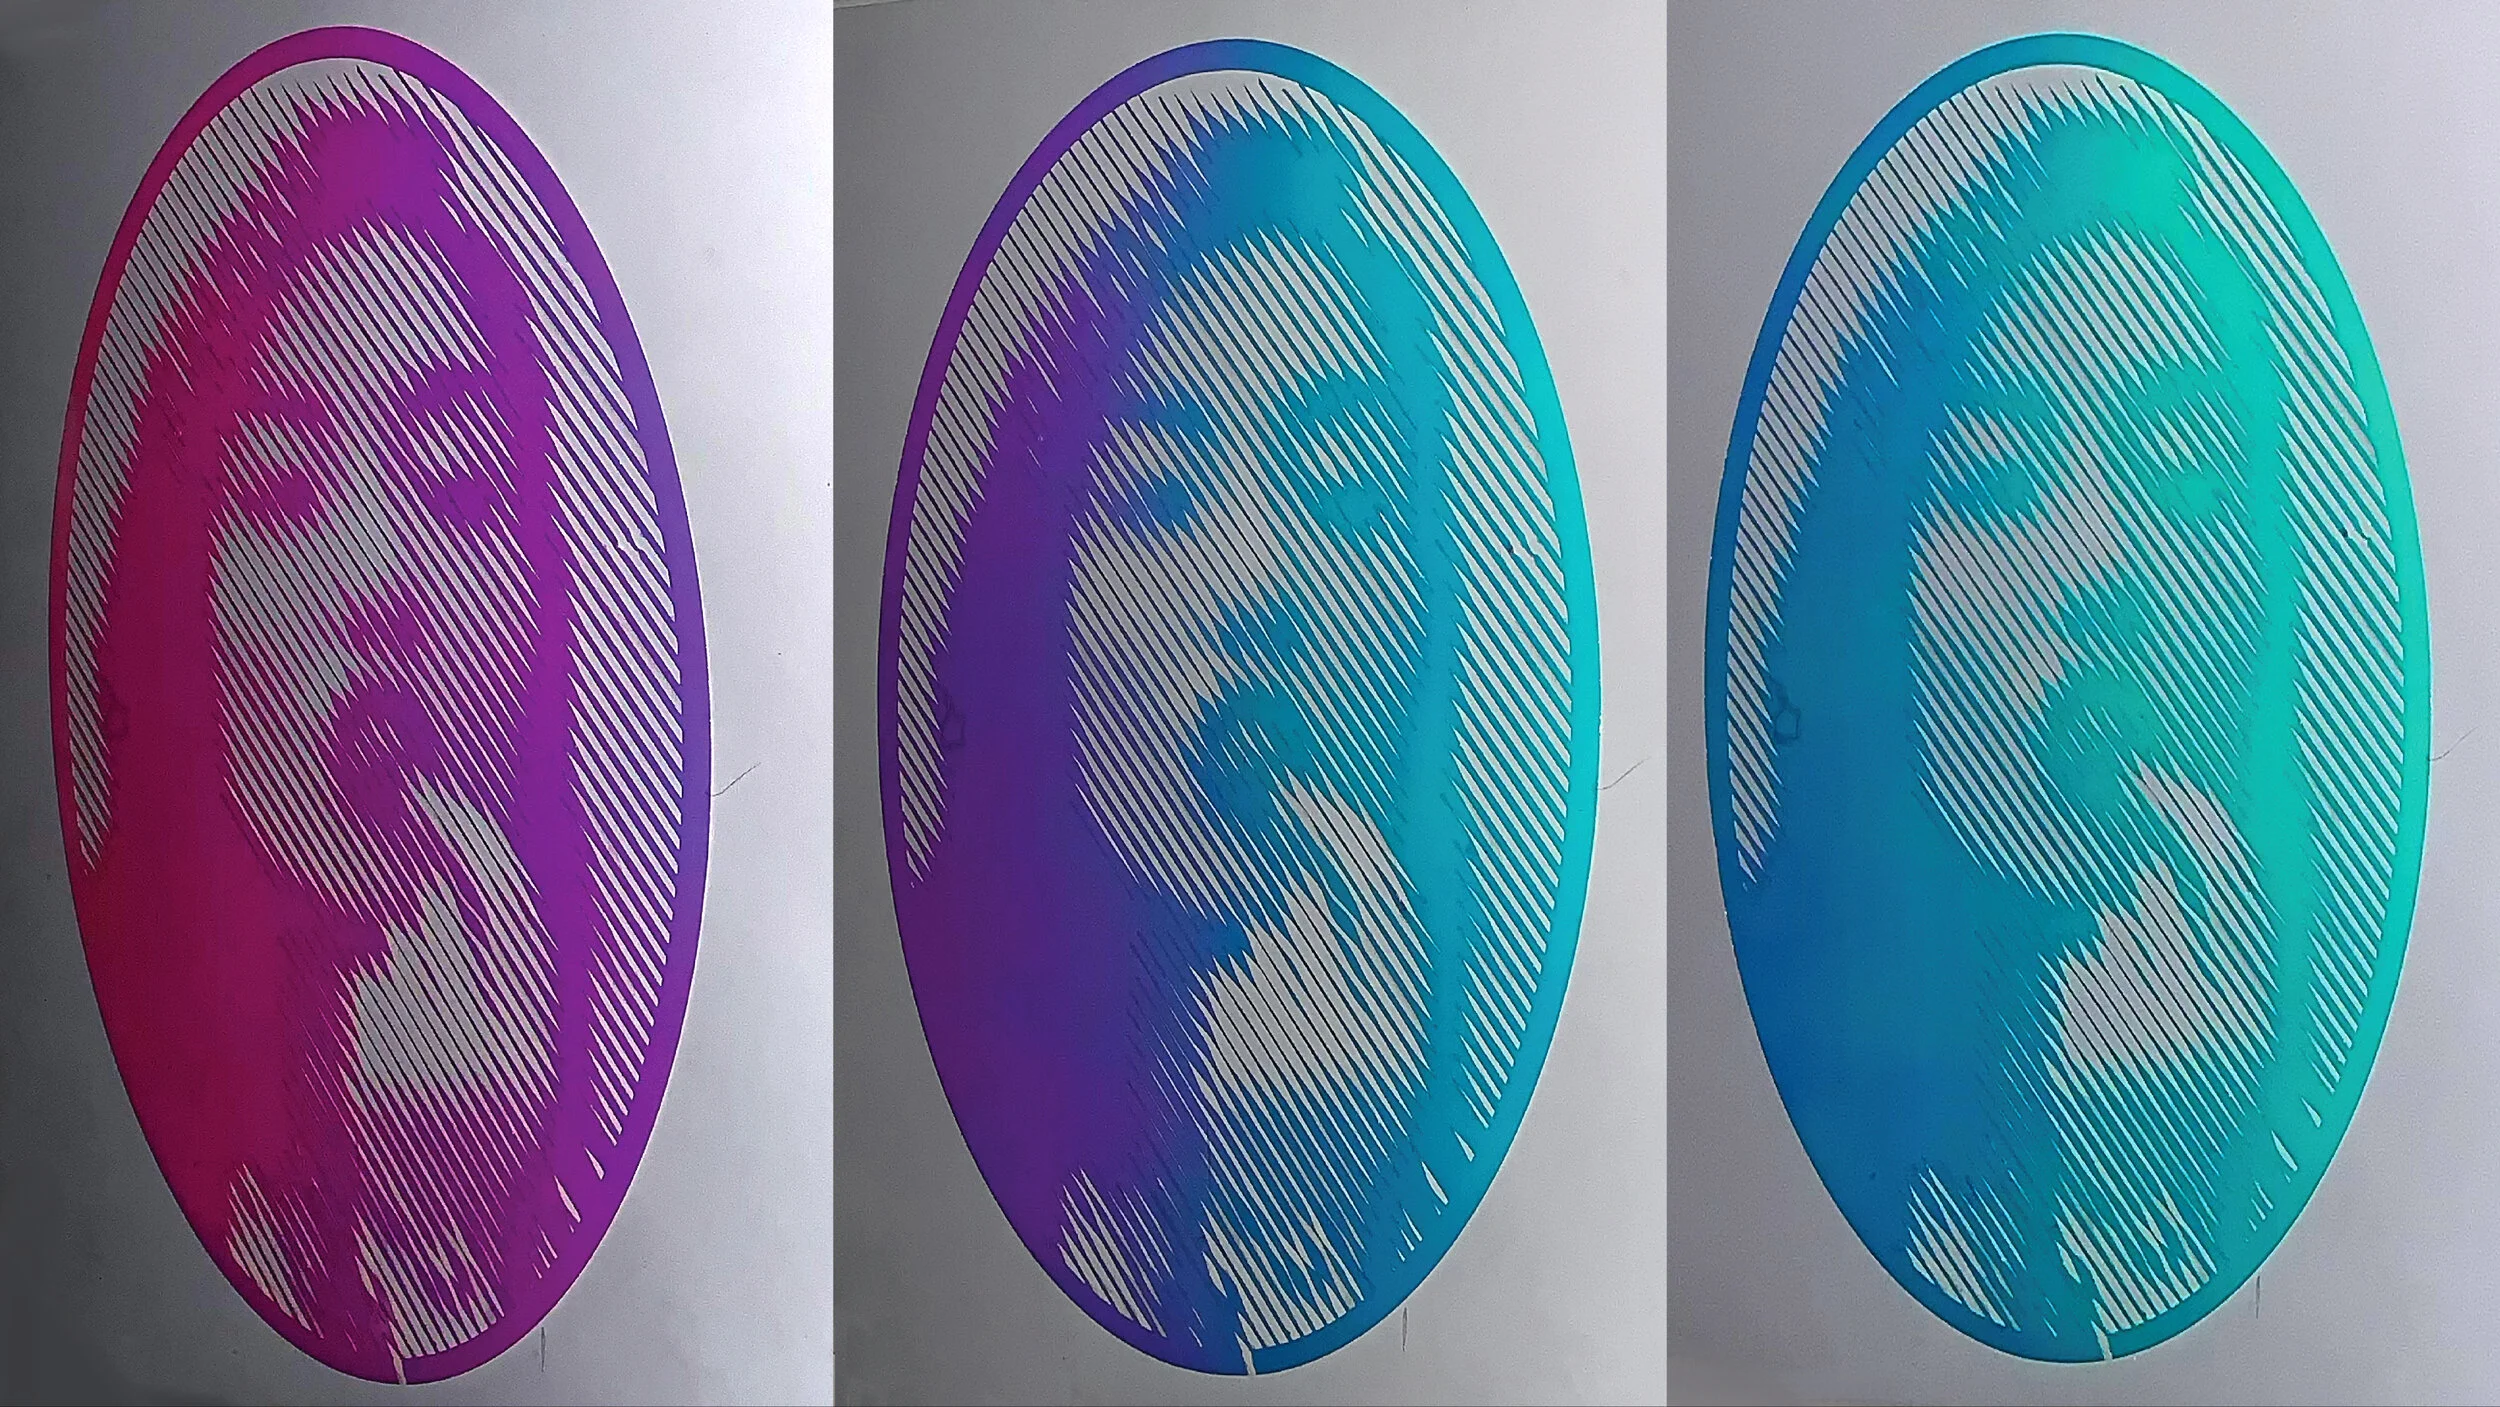
After creating the program, I took advantage of the Cameo 4 vinyl cutter that was sent to me for subtraction class to test the program and turn a digital image into a halftone portrait cut from dichroic film.
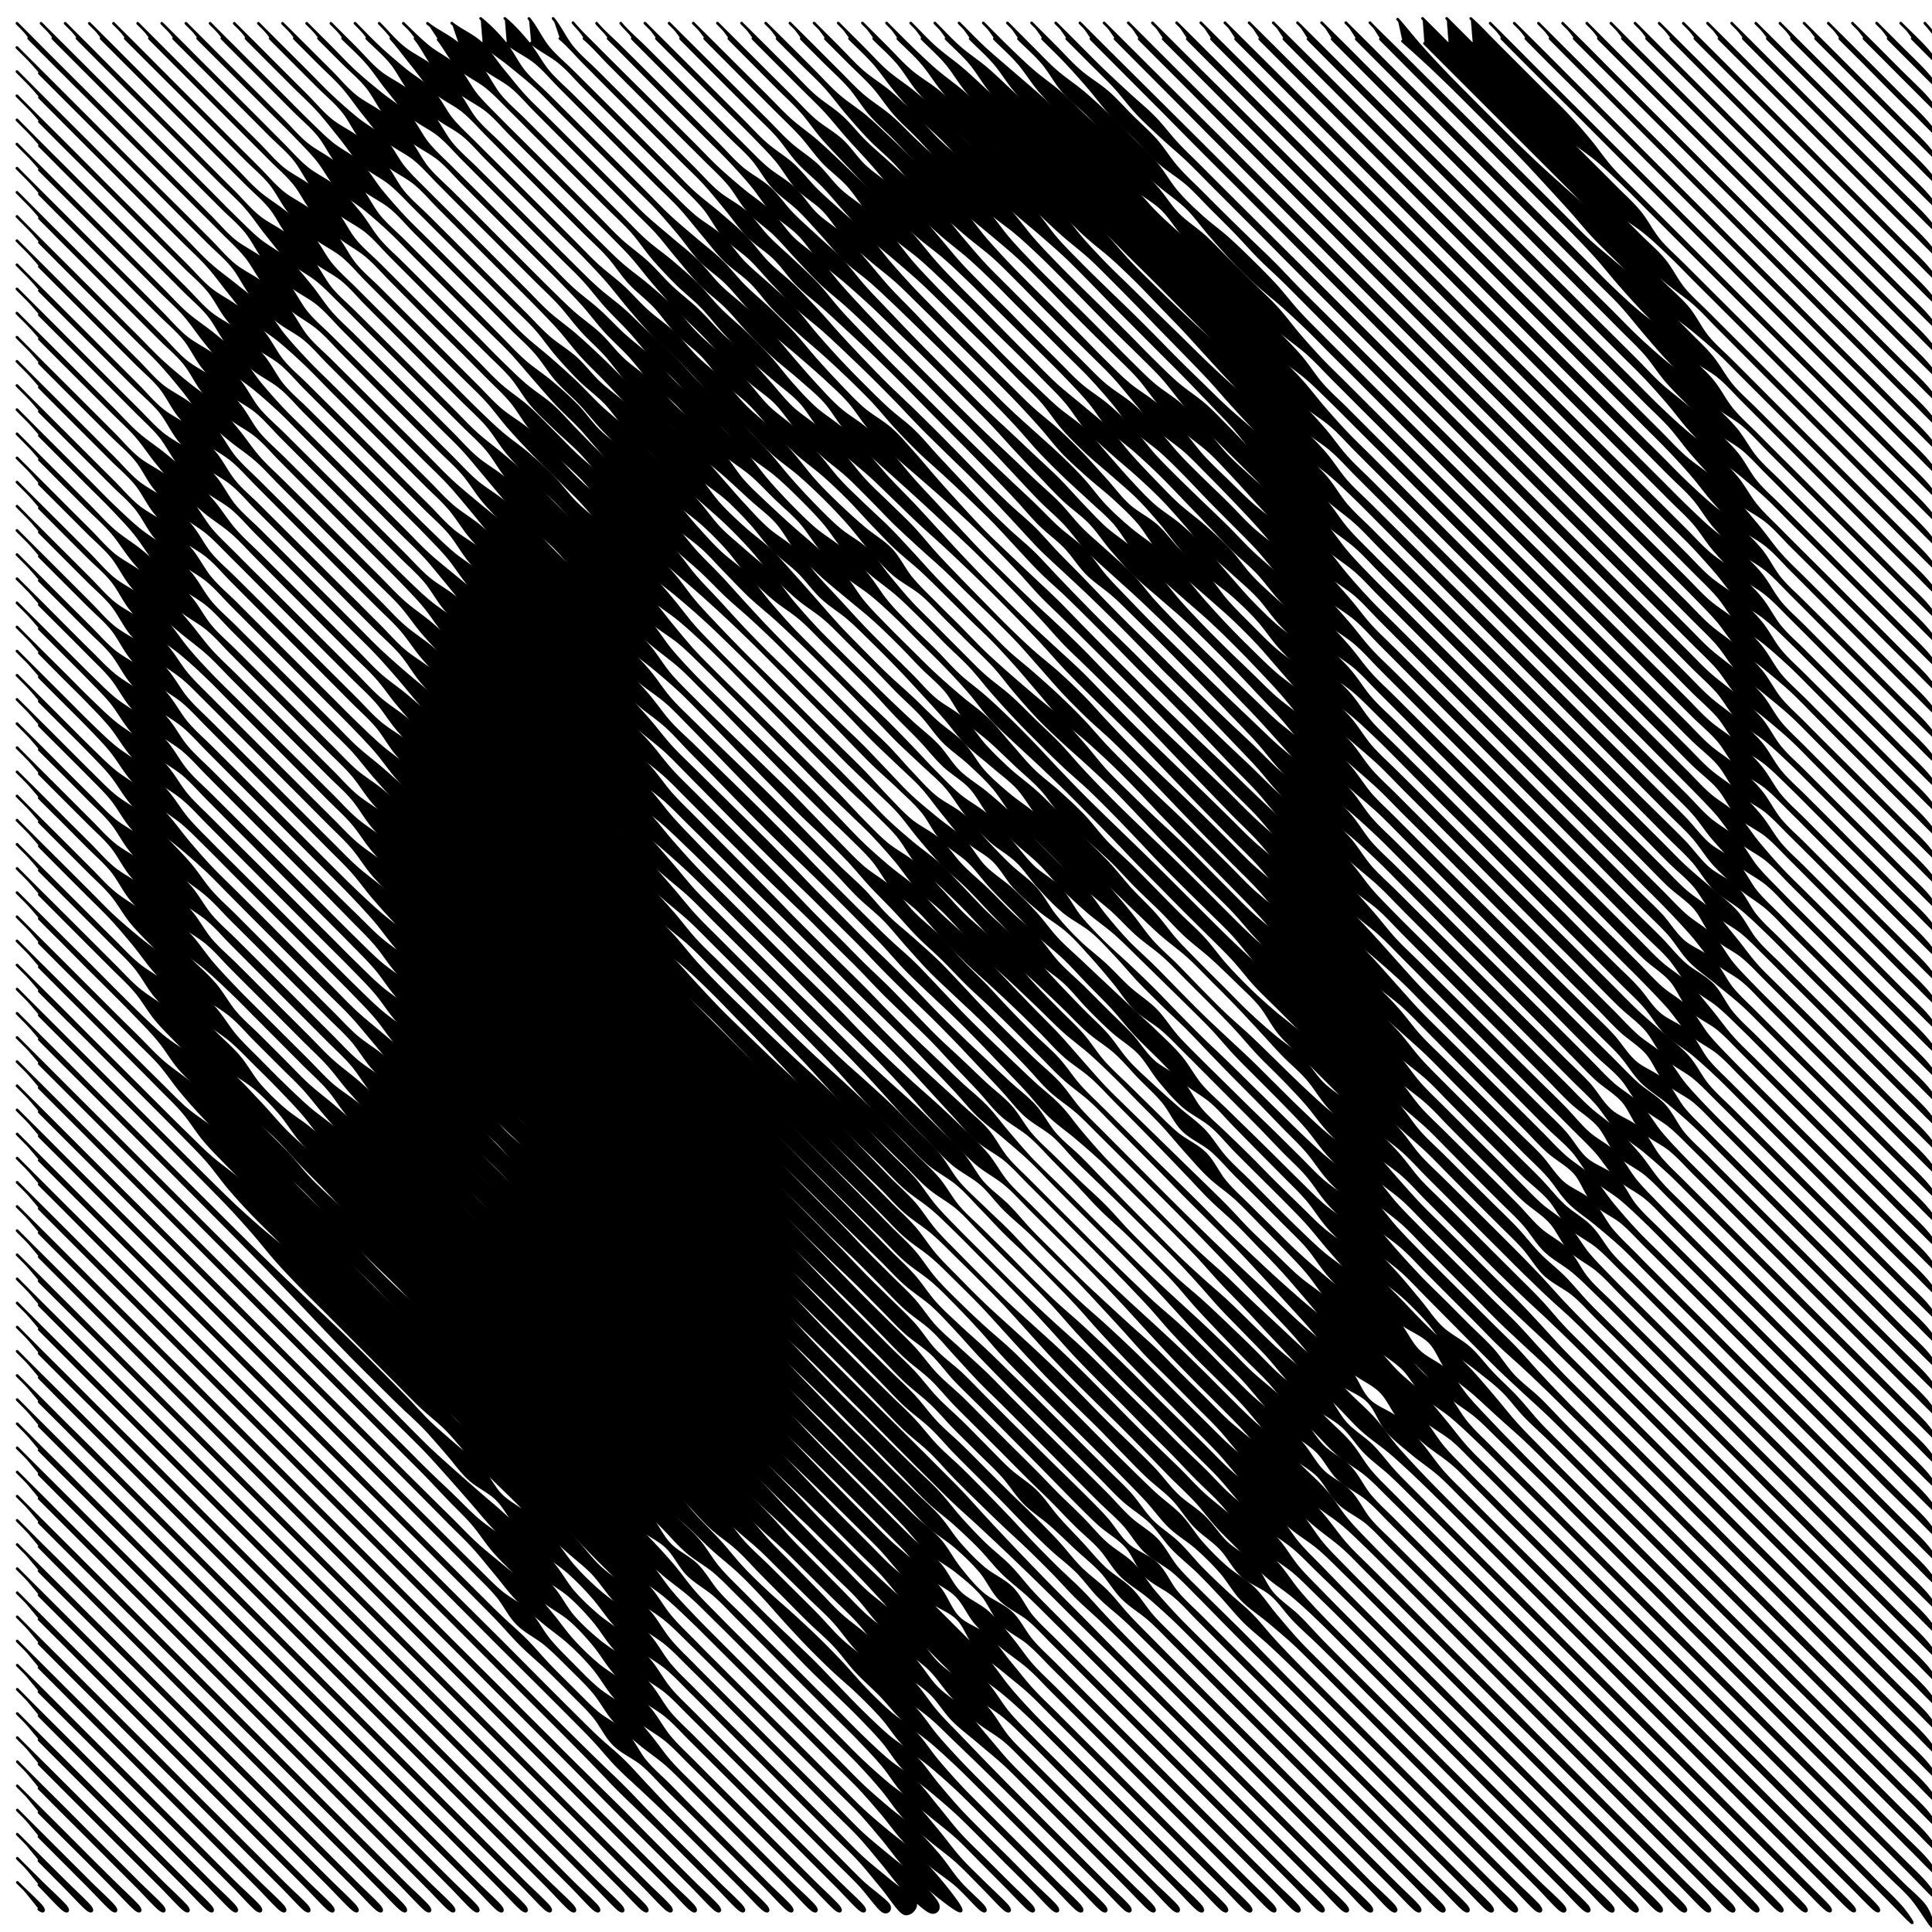
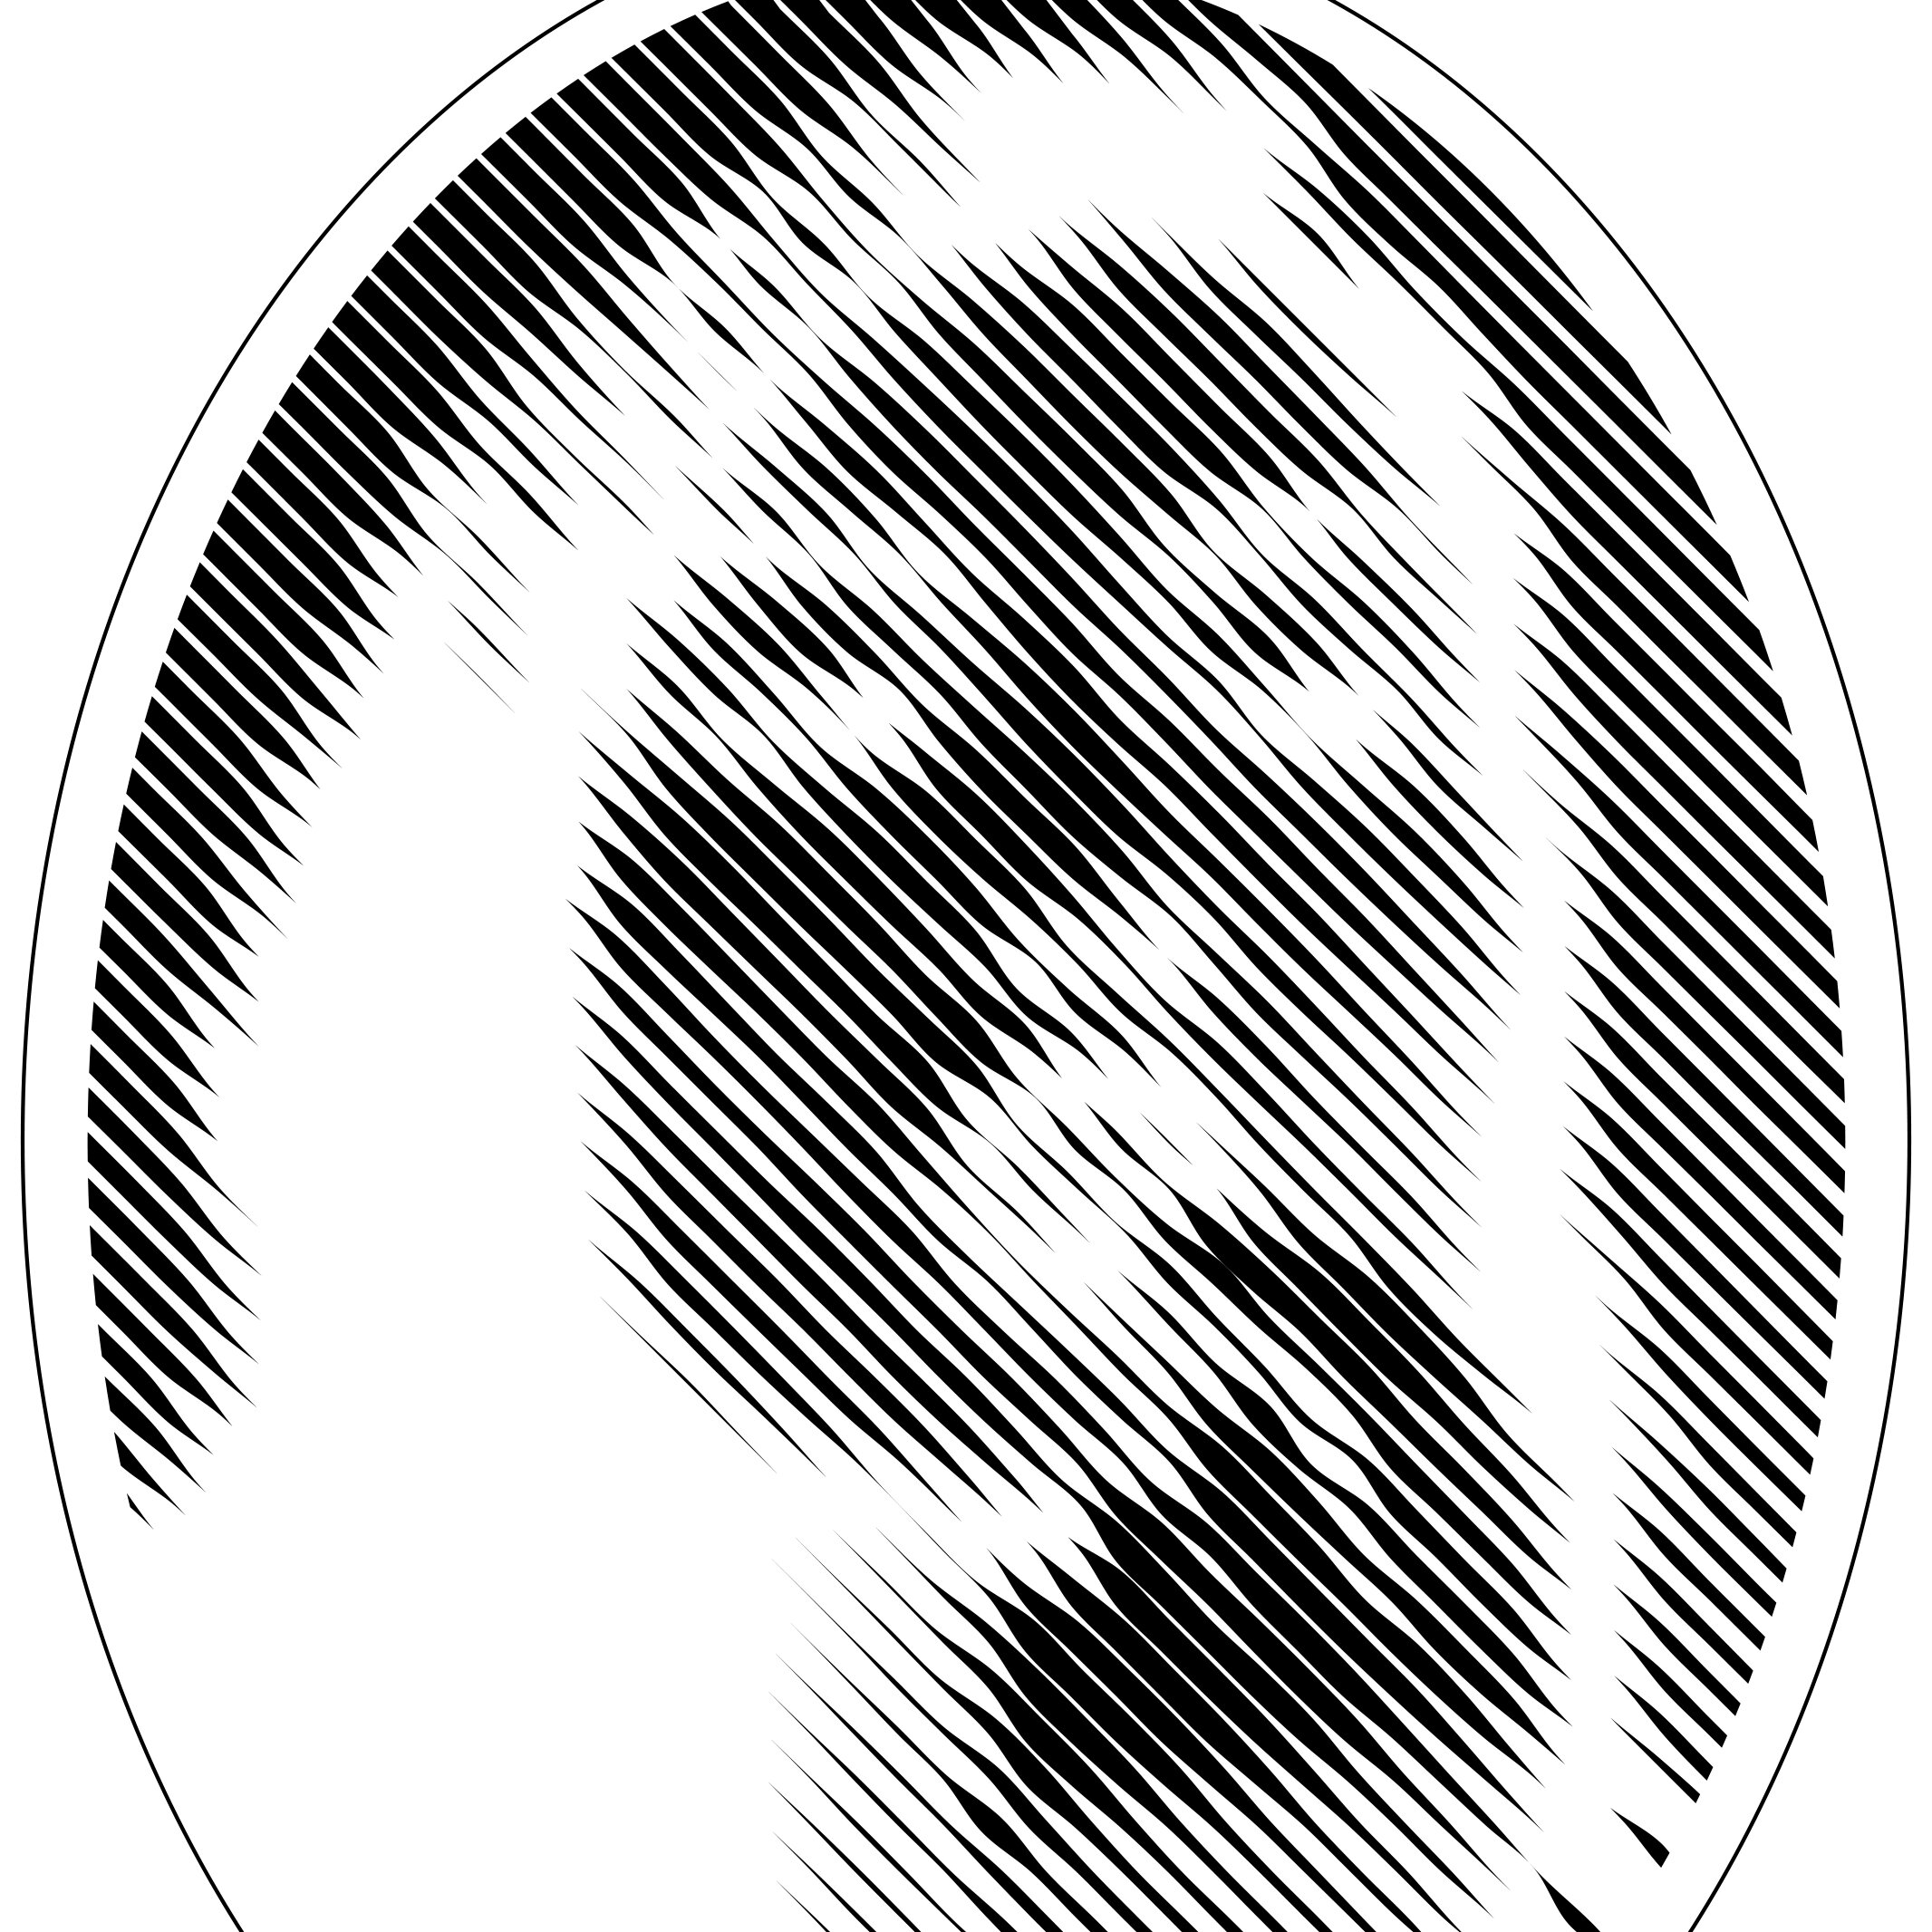
This sketch uses a handful of halftone dithering algorithms, as well as particle simulations where the parameters of the world depend on the photo it lives on top of. This program allows you to input an image or take live webcam input and switch between each of these modes of operation. (1 Circles, 2 Circles (Radial), 3 Vertical lines, 4 horizontal lines, 5 Diagonal lines, 6 Particles dark = dark spots, 7 Particles light= light spots, 8 Particles - light = light dots that push each other away.
Below are the input image, the output of the processing sketch, and the output of the sketch run through illustrator to grab the inverse of the image. This way we are cutting out the parts of the image (black) that will appear to be the white parts on the result.
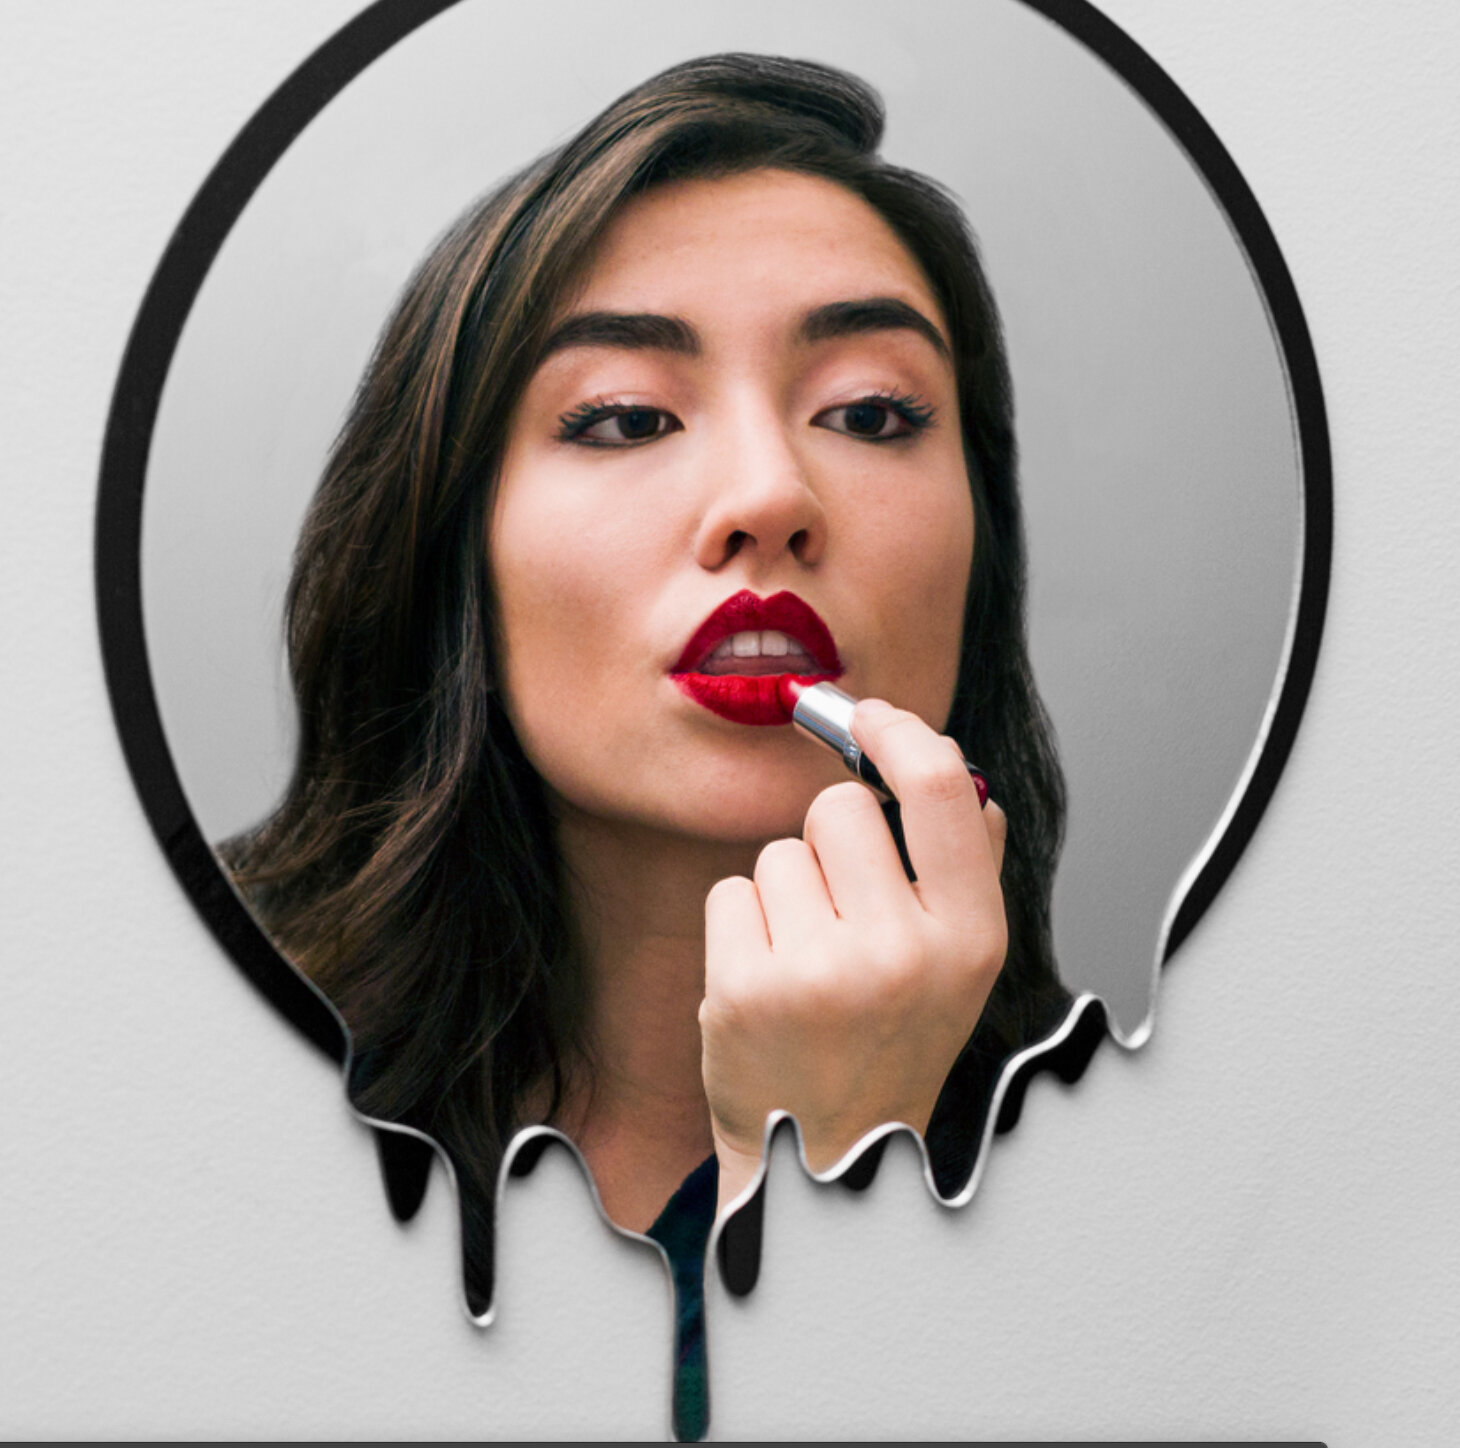
Below are the output of the vinyl cutter (left picture) each cut piece has to be pulled off individually with tweezers. Behind is the transfer paper that the dichroic come on. Another piece of transfer paper is then applied to the remaining dichroic and transfer (middle picture). Then you take off the original transfer paper, spray the sticky backing of the dichroic and the plastic final backing with soapy water, and apply the film to the clear plastic with a credit card to push out the water and air bubbles (right picture).
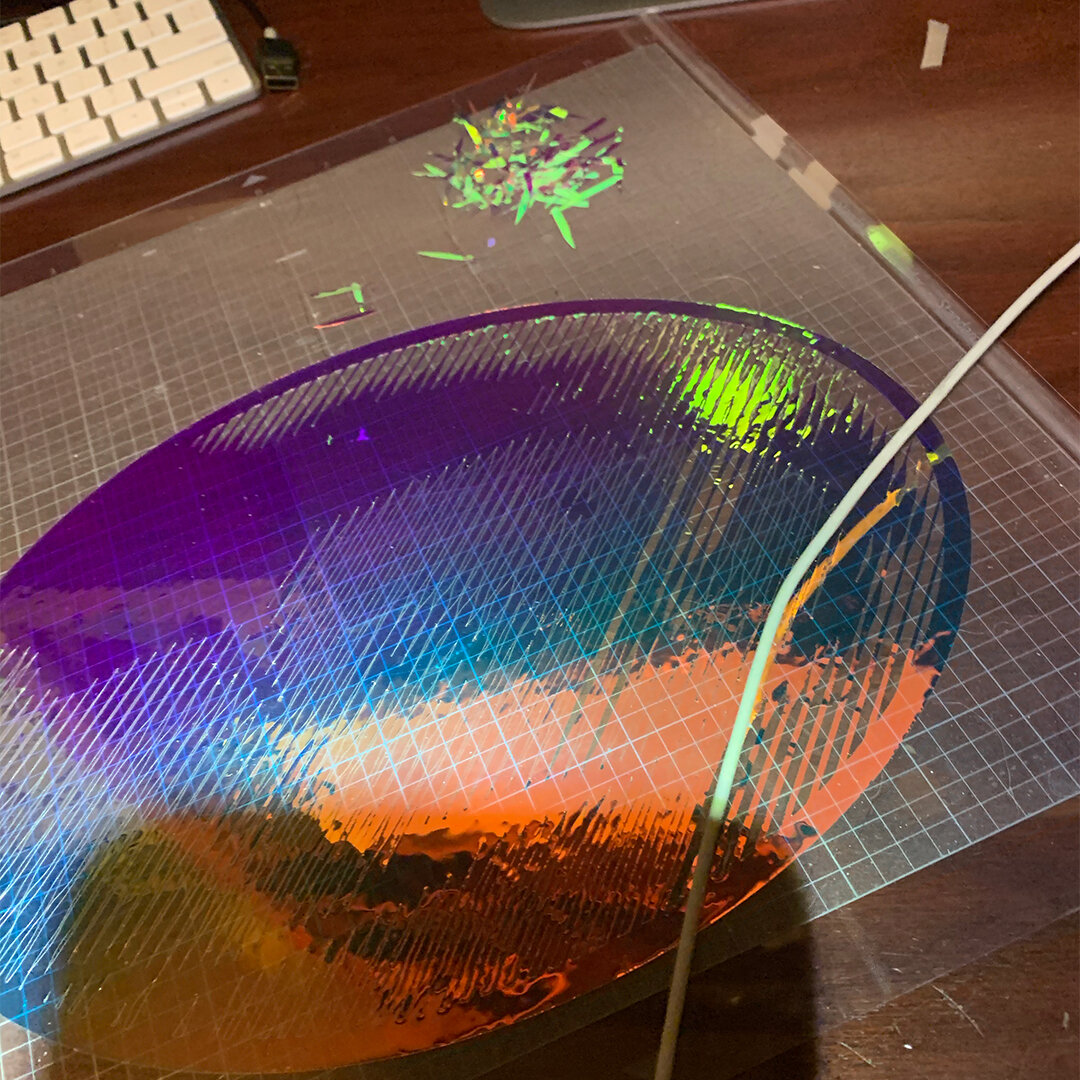
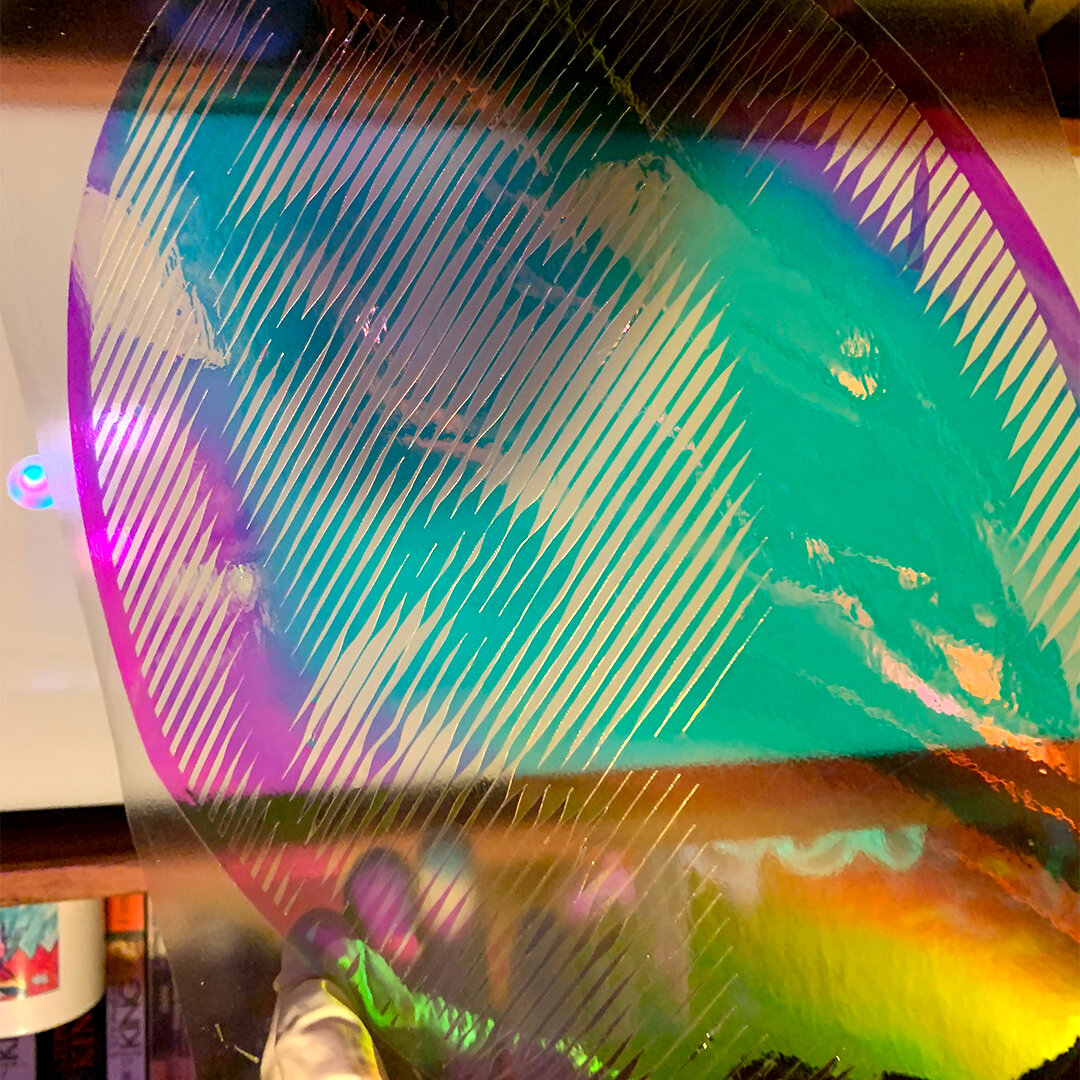
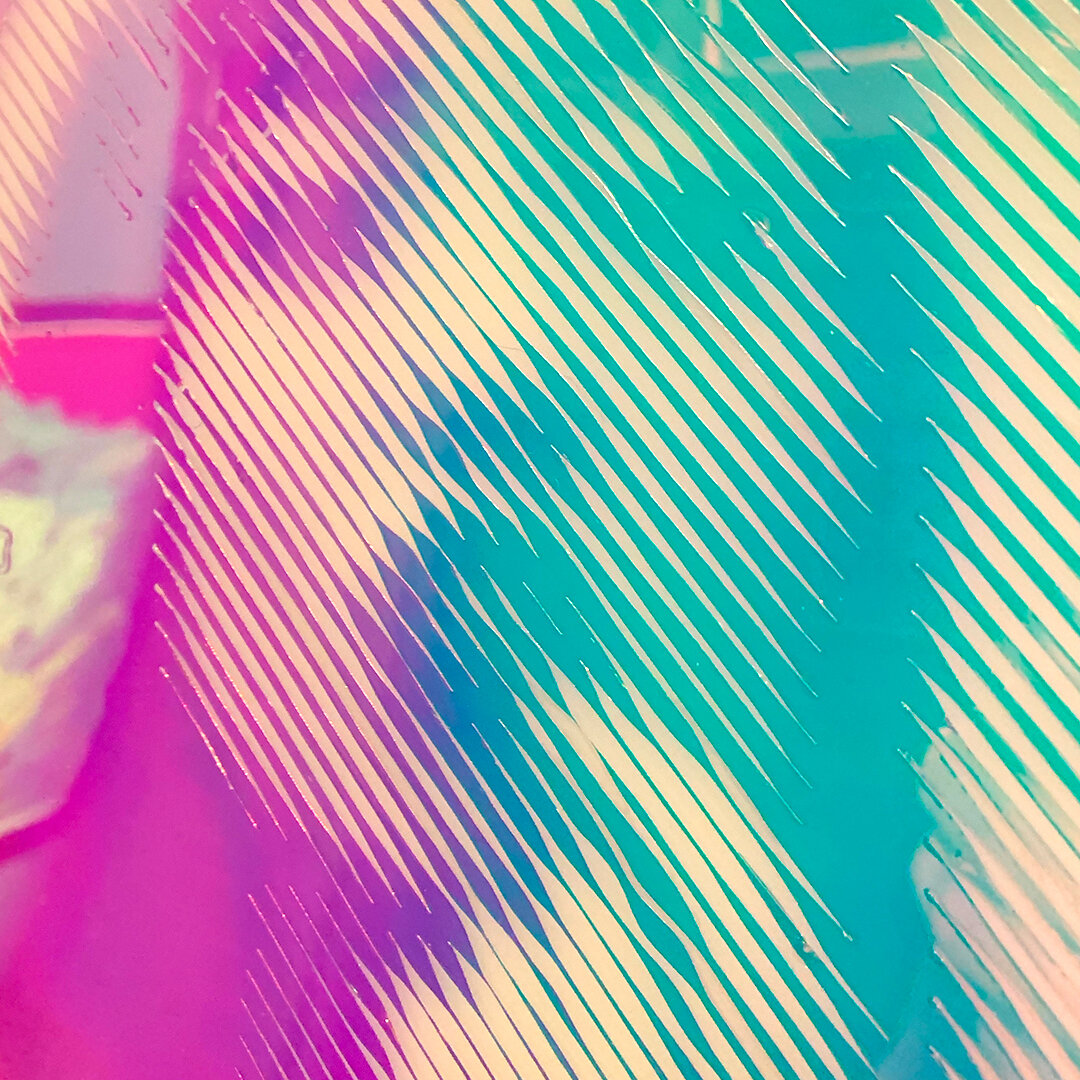
The result: the image changes colors as you move past it from pink -> purple -> blue -> turquoise.
Generative Art: Pixel By Pixel
Tiny Cubes
A cube made of mini rotating cubes rotates in 3d space is a paintbrush. The distance between cubes, and size of cubes is determined by the mouse coordinates.
Tunnel Flow
Rectangular tiles programmed to rotate, change color, and change speed based on trigonometric functions.
Smoky Black Hole
Processing sketch which calculates the center of mass of a particular color of pixel (based on mouse click), bits of video accelerate towards the center of mass reducing saturation relative to the distance from the pixel to the center. Uses code from previous smoky bits program.
Smoky Bits
Generative spray painting sketch. You choose a color and brush size, the paint particles flow and mix with each other using a semi random distribution which end up creating giant particle clouds. Skip to end of video to see result.
Contour Displace
Processing sketch which uses openCV to detect contour edges. Pixels inside of contour are blurred by randomly displacing particles. The blur increases with distance from the mouse so you can make clear the areas you point at.